Complementary filters and wide-angle underwater photography
If you’ve been shooting with a digital camera for any period of time and been online then you’ve probably heard the rave reviews about the Magic Filter developed by Dr. Alex Mustard and Peter Rowlands. This is a filter that goes on (or behind) the lens and is used to filter out “undesirable” light, allowing more vibrant color to reach the camera’s sensor, and ultimately to be recorded. The magic filter builds on principles that were thoroughly explained in an article here on Wetpixel by Craig Jones back in 2003 called “Filters and Ambient Light Photography.” Craig took the concept a step further when he started experimenting with complementary filters, going beyond ambient light photography. To simply explain: a filter is used on the camera lens to reject undesirable ambient light and a complementary filter is used on the strobe, to allow foreground lighting to be used but to appear natural. For example, if you take a photo in a dark room using the complementary filter set, the shot will appear “normal.”
Background:
When I booked a trip to Little Cayman, I reasoned that I would be shooting mostly wide-angle photos and it would be a perfect time to test the filters. Craig recommended one of the easiest filters to use – a CC30m (for magenta). This filter blocks cyan from entering the lens and is weak enough that it can be used in shallow water without making everything appear too magenta. It’s also easy to pick a complementary filter for this one because it is not a mix of colors – a CC30g (for green) is the perfect complement. This combination will knock down your total exposure by about one stop, so be prepared to use a smaller f-stop and more strobe power. I ordered a 77mm CC30m screw on Hoya filter from B&H and some Optiflex CC30g resin filters which are about 1mm think. These can be cut with a hobby knife, but are pretty fragile, so be careful not to crack them. They are a special order item and took about 10 days to arrive. I cut them into round units to fit under the diffusers I made (milk jug material) for my Ikelite DS200 strobes.
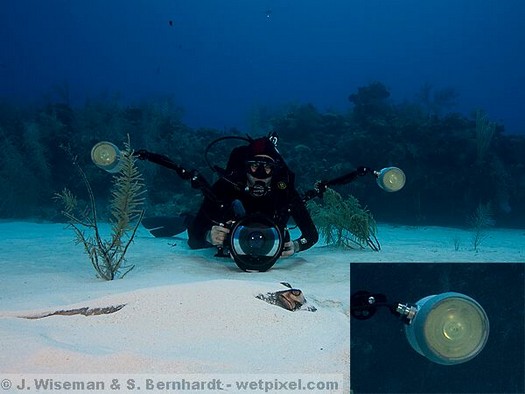
Photo of set-up – Inset showing the Ikelite DS200 strobes with the CC30g Resin Filter mounted behind an opaque piece of “Milk Jug.”
Here is an example of what the end product looks like. This photo was taken in about 40 feet of water with excellent visibility.
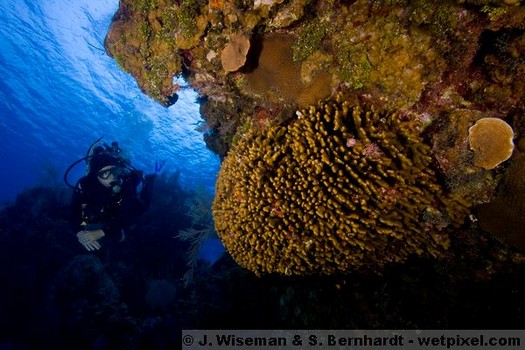
Canon 1DsII with 17mm Tokina lens. F7.1 @ 1/160th, ISO 200, (2) Ikelite 200’s on ½ and Full.
The following photos are for comparison purposes. Because my wife and I have similar camera set-ups I was able to do what hasn’t been done before – capture an identical scene, under the same sunlight conditions using a “standard” unfiltered wide-angle setup, and a filtered wide-angle setup.
For each shot the white balance was set at 5000K with +10 tint using ACR. Exposure was brought up by 1 ½ stops for the first photo so that the exposure values (in camera at least) will be the same.
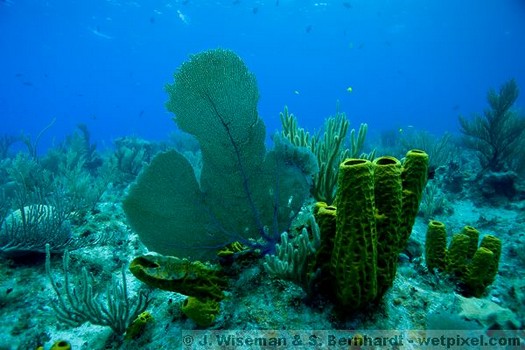
Photo 1 - No filters used. 17mm f6.3 @ 1/250th
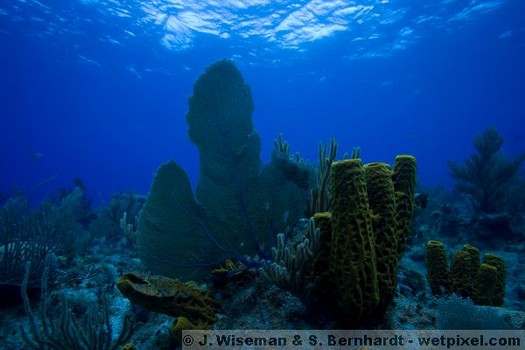
Photo 2 - CC30m filter on lens, strobes off, f7.1 @ 1/60th
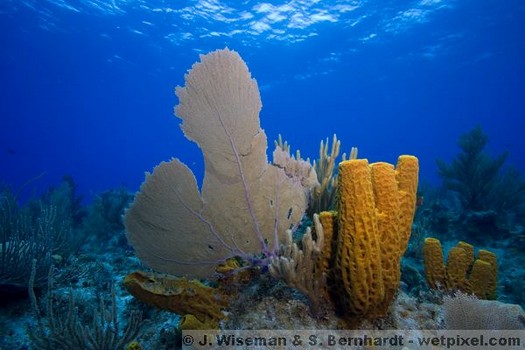
Photo 3 - CC30M filter on lens, CC30G filters on strobes, f7.1 @ 1/60th
Observations:
Clearly there is more cyan in the first photo. This can be corrected in post processing by changing the white balance value; however this can have a “red-graininess” effect and can also result in purple water. The second photo shows much bluer water, but not much color in the foreground. This is due to a number of factors. Firstly, the Caribbean reefs just aren’t that colorful to begin with. Secondly, as a general rule, when using a filter on the lens, it’s best to shoot with the sun behind you, so that it shines down on the subject. However, if you follow this rule, you can’t get a sun-ball into the picture! The important observation (at least to me) for photo number 2 is that the water shows a very pleasing blue, even at 5,000Kelvin.
The third photo says it all. It shows a pleasing blue background and a foreground with colors that really pop. In this example, you can also see that the surface of the water is not “blown out” and does not look magenta. That indicates that the CC30m filter was a good choice.
Discussion:
A byproduct of using the filter on the lens is that it blocks cyan light in photos with a “sun-ball” in the frame. One of the common critiques of digital underwater capture is that the sensor does not render the sun very well. This is because unlike film, the digital sensor has a linear response to light. The direct sun quickly saturates the sensor with blue and green light, basically “filling up” the pixels before red and the other warm colors can be recorded. A filter on the lens which removes some cyan light basically lets you get the same blue water exposure that would result in a blown-out sun, but instead, the green/blue ring around the sun is removed. The following photo is an example – shot directly into the sun at noon in 50’ deep water.
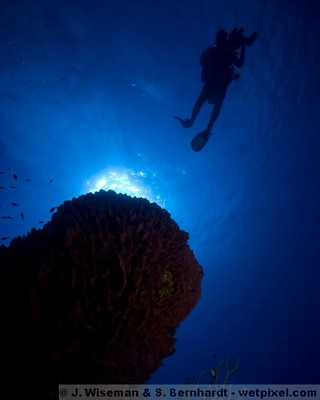
f11 @ 1/250th, ISO100, shot straight into the sun at noon
Conclusion:
Complementary filter photography at first sounds pretty complicated, but it’s really easy to get started and it won’t “screw up” your photos. After trying it one just one trip, I am completely hooked. It may take some experimentation to discover the correct complements for all of the red/orange/magenta filters out there, but I’m hoping this article will spur people into putting in some thought and time to experiment for the benefit of the underwater photo community. If you’re interested in trying something different that might just bring your wide-angle photos up a notch then I highly recommend complimentary filter photography.
-James Wiseman