Reviews: CrumplePop plug-ins for GoPro POV cams
There are so many videographers, hobbyists, and professionals, using GoPro Hero camcorders these days, that it makes me wish I had some stock in the business. Finally, an investment that might pay off for me.
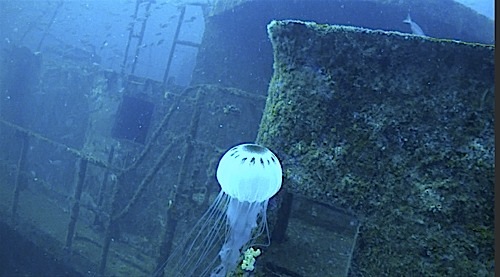
Often the footage I and others get with the GoPro and other camcorders of this genre, especially when filming underwater, is very soft and not as well-defined as we would like. The colour saturation and sharp contrast is just not there. With lots of time and work, we can improve the look of our footage using Final Cut Pro’s colour correction tools but, for me, I frequently do not have all the time at my disposal as I would prefer. Once again, CrumplePop, makes my life a whole lot easier with their very latest plug-in called ‘HDR for GoPro’.
With the introduction of ProTools in the firmware updates for the GoPro HD HERO 2 and their new Black and Silver 3 models, and with the ProTools set to ‘On’ in the GoPro settings, you can now shoot with 35mbps VBRate producing a considerably crisper image than with the GoPro’s original 15mbps. This increase in bit rate is especially advantageous for those doing some serious colour grading in post-production. CrumplePop’s HDR for GoPro is designed to retain the detail in the shadows and highlights of your frames and punch up the contrast as it is applied. When I first saw their ad I thought, “Ok, another type of colour grading plug-in”, but when I first applied it, “Wow” was all I could say.
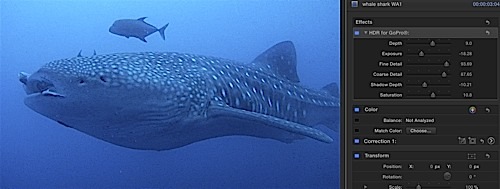
Found in Final Cut Pro X’s effects/utilities folder, there are several HDR’s parameter settings for you to work with, but not so much as to overwhelm you or over/under correct the clip you are working with. In addition, while the name of this CrumplePop plug-in is HDR for GoPro, it works just as well with footage from any of the other POV camcorders on the market today.
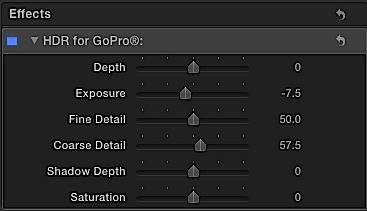
The Depth setting adjusts the mid-tones and highlights of clips. I found that this control was really quite subtle when moving the slider from one side to the other. It appears to separate the mids and highlights providing a unique pop to the footage.
The Exposure setting is typical of most in that it simply brings up or down the amount of exposure you feel is necessary. You can use this along with the waveform monitor in FCPX to be sure you are not going too far in either direction.
The Fine Detail parameter brings out the contrast and appearance of the smallest details making them more apparent to the viewer.
The Course Detail parameter works with the entire image bringing back even more details, especially so on the outlines and edges found in your footage.
The Shadow Depth parameter is another useful tool in that it can fix the depth within the shadows that may be crushed a touch too much. It helps maintain the balance between light and dark enabling you to create a highly dynamic appearance.
The Saturation tool, like most of its kind, allows you to control the amount of colour saturation in the footage.
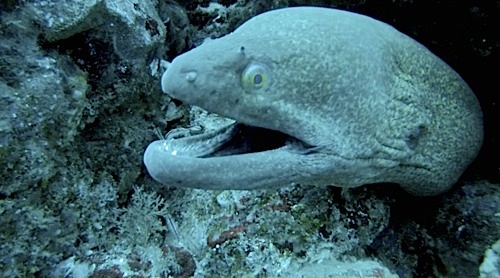
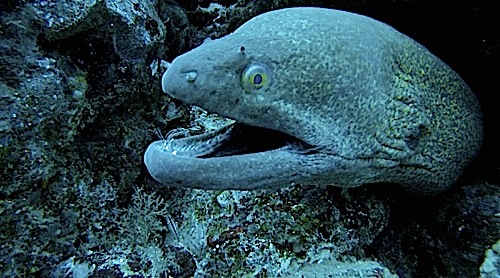
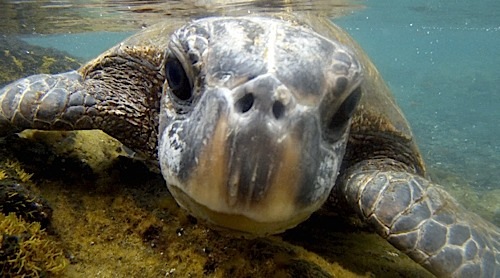
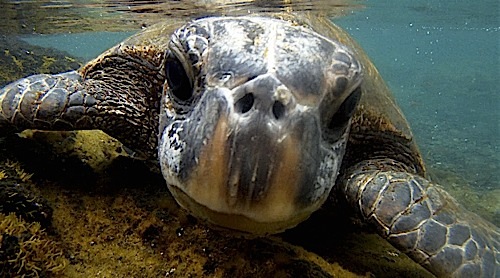
Using CrumplePop’s HDR plug-in was beneficial in ways I hadn’t noticed before in some images. Below, in the original frame, shot with a GoPro, I hadn’t noticed how blurred the turtle’s nose really appeared. I thought it was just a soft image typical of much of the POV cam’s type of footage when shot underwater.
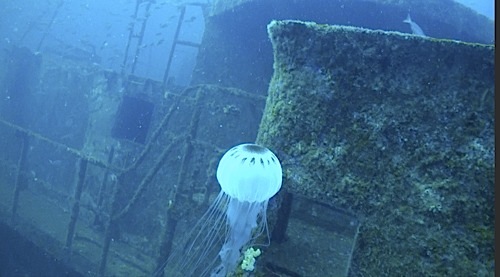
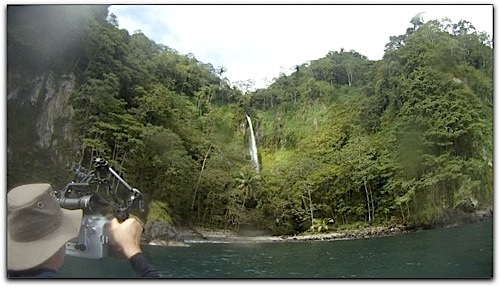
With the GoPro’s super wide-angle lens, as with the many other cams in this genre, they also produce a strong fisheye appearance. This might be just the thing for some footage but you are unlikely to want an entire film shot in complete fisheye.
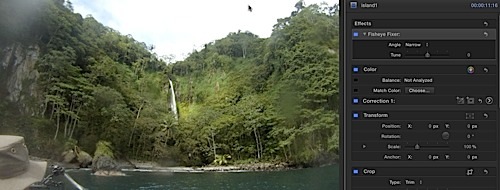
CrumplePop recently came out with their Fisheye Fixer plug-in for Final Cut Pro X. It is designed to straighten out the horizon and push those curves back into straight lines. Once downloaded and installed in FXPX, the Fisheye Fixer can be found in the Utilities folder of your FCPX’s effects menu.
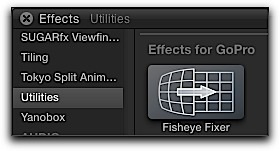
The Fisheye Fixer is applied the same way as you would any other filter by highlighting the clip in your timeline and either double clicking on the Fisheye Fixer filter icon or by dragging and dropping it on the clip.
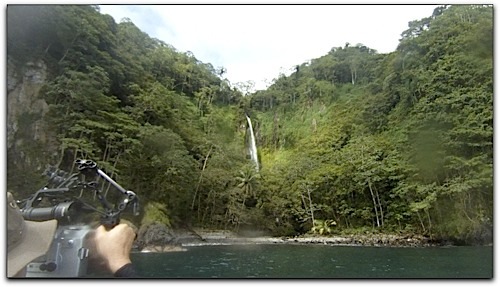
The CrumplePop Fisheye Fixer works by slightly scaling up the image as it fixes the distortion created by the lens of the camera. While there is no way that I know of to measure the percentage of upscaling, I did not see much degradation to the footage either on my computer or external monitor. Any loss of detail was slight. At the same time, the Fisheye Fixer softens the harshness of the footage making it more comparable to any footage you have shot with other camcorders.
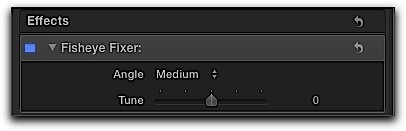
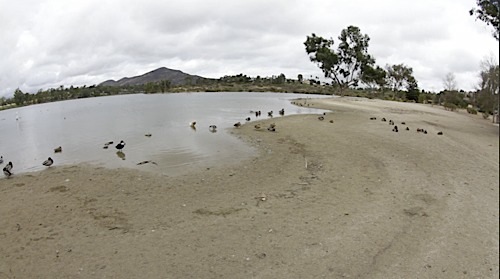
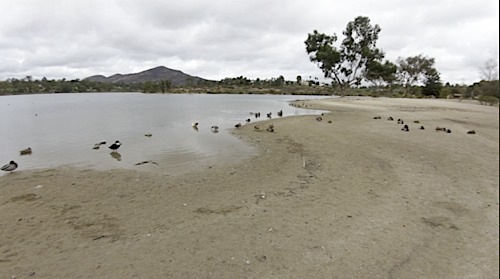
There are only a couple of parameter settings that come with the Fisheye Fixer. The angle drop-down menu defaults to Medium which is really all you need for the Fisheye Fixer to work.
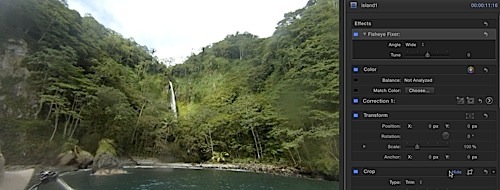
However, you can reverse the curved image if you want by changing the default ‘medium’ to ‘wide’ as shown below.
Don’t let the name fool you, this plug-in works just fine with lenses other than the GoPro too.
Complexity can ruin the simplest of things. The Fisheye Fixer from CrumplePop has kept things simple, easy to use and affordable.
The only tools one needs when working with any non-linear editing system are those that you will actually use. There are a great many sets of plug-in effects produced by any number of companies, often at great cost. Within these sets are filter effects and transitions that you actually use, but they are often supplemented with a bunch of effects that you wouldn’t be caught dead applying. Try a little self-honesty and evaluation and I am betting you can count on your hands a very limited number of effects that you consistently go to when editing. For those whose GoPro is part of their shooting arsenal, both the CrumplePop HDR and Fisheye Fixer plug-ins are those gem filters that will make you happy you purchased them.
Both plug-ins are available from CrumplePop as downloads at $49.00 each.
FTTC Disclaimer: The CrumplePop software was supplied to the article’s author free of charge for review purposes.
About the author:Steve Douglas is a certified Apple Pro for Final Cut Pro 7 and underwater videographer. A writer and reviewer for the kenstone.net and lafcpug.org editing websites, Steve was a winner of the 1999 Pacific Coast Underwater Film Competition, 2003 IVIE competition, 2004 Los Angeles Underwater Photographic competition, and the prestigious 2005 International Beneath the Sea Film Competition, where he also won the Stan Waterman Award for Excellence in Underwater Videography and ‘Diver of the Year’, Steve was a safety diver on the feature film “The Deep Blue Sea”, contributed footage to the Seaworld Park’s Atlantis production, and productions for National Geographic and the History channels.
Steve was a feature writer for Asian Diver Magazine and is one of the founding organisers of the San Diego UnderSea Film Exhibition. He is available for both private and group seminars for Final Cut Pro and leads underwater filming expeditions and African safaris with upcoming excursions to Bali, Raja Ampat, Indonesia, and the Maldives Islands. Feel free to contact him if you are interested in joining Steve on any of these exciting trips.